Raspberry Pi3のC++開発環境をVS Codeで構築
2018年3月、Raspberry Pi3のC++開発環境をVisual Studio Code(VS Code)で実現しました。
少し前に、Windows環境で動作するVisual Studio Codeを使用して Windows Subsystem for Linux(WSL)で動作するUbuntuのC++開発環境を構築しました。
VS Codeは、マイクロソフト社が開発したクロスプラットフォームで動作する高機能なソースコードエディターです。VS Codeはエディターであり、Visual Studio 20xx のような統合開発環境(IDE)ではありません。しかし、デバッグ機能やタスク機能(頻繁に行う作業の自動化)が組み込まれています。従って、「コード編集→ビルド処理→デバッグ実行」がVS Code内で行うことができます。
マイクロソフト社のVisual Studio Codeサイトによれば、VS Codeは Mac OS X/Linux/Windowsのプラットフォームで動作します。ということは、Raspberry Pi3のRasbian OSでもVS Codeは動作する可能性があると考えました。
Linux用のパッケージはx86アーキテクチャー用なので、ARMアーキテクチャーのRaspberry Pi3では動作しません。また、Raspbery Piで使えるリポジトリーは存在しないので「sudo apt install」でインストールできません。
ネットで検索した情報によると、VS Codeのソースをダウンロードしてビルドすれば動作するようです。
いろいろ試した結果、Raspberry Pi3でVisual Studio Codeを使用してC++開発環境を構築できました。
Visual Studio Codeのインストール
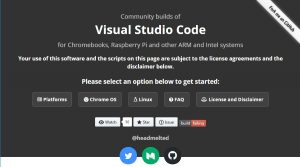
ソースコードからのビルドは面倒です。Raspberry Pi用バイナリーを公開しているサイトがありましたので、Community builds of Visual Studio Codeからダウンロードしました。
サイトの説明に従ってVS Codeをインストールします。
管理者権限で wgetによりダウンロードして実行します。
$ sudo -s
# . <( wget -O - https://code.headmelted.com/installers/apt.sh )
・・・
Visual Studio Code install complete.
Installing git...
・・・
Installation complete!

You can start code at any time by calling "code-oss" within a terminal.

A shortcut should also now be available in your desktop menus (depending on your distribution).


# exit
$
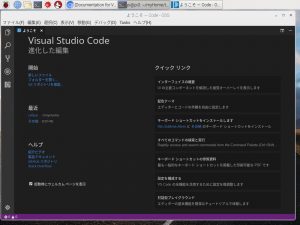
インストールが完了すると、「メニュー>プログラミング>Code – OSS」が追加されます。[Code – OSS]を選択すると、Visual Studio Codeが立ち上がります。
Visual Studio Code のバージョンを確認します。「ヘルプ(H)-バージョン情報(A)」と入力します。
バージョン 1.14.0
コミット 05b254dcfb44422238c6fdb665721a41ee4ce6ac
日付 2017-06-20T20:22:03.289Z
シェル 1.6.6
レンダラー 56.0.2924.87
Node 7.4.0
Windows10版のVS Codeは、「バージョン 1.21.1」でした。こちらのパッケージは「バージョン 1.14.0」なので、ちょっと古いです。
Rasbian OS C++開発環境
Raspberry Pi3 で使用する Rasbian OS のC++開発環境を構築します。
gccを使用できるように開発ツールをインストールします。
sudo apt install build-essential
gdbデバッガをインストールします。
sudo apt install gdb
使用したツールのバージョンを下記に示します。
$ lsb_release -a
No LSB modules are available.
Distributor ID: Raspbian
Description:    Raspbian GNU/Linux 9.4 (stretch)
Release:        9.4
Codename:       stretch
$ gcc --version
gcc (Raspbian 6.3.0-18+rpi1+deb9u1) 6.3.0 20170516
Copyright (C) 2016 Free Software Foundation, Inc.
This is free software; see the source for copying conditions.  There is NO
warranty; not even for MERCHANTABILITY or FITNESS FOR A PARTICULAR PURPOSE.
$ gdb --version
GNU gdb (Raspbian 7.12-6) 7.12.0.20161007-git
Copyright (C) 2016 Free Software Foundation, Inc.
This is free software: you are free to change and redistribute it.
There is NO WARRANTY, to the extent permitted by law.  Type "show copying"
and "show warranty" for details.
This GDB was configured as "arm-linux-gnueabihf".
$ make --version
GNU Make 4.1
このプログラムは arm-unknown-linux-gnueabihf 用にビルドされました
統合ターミナルの設定
Visual Studio Code の統合ターミナルの設定をします。「[Ctrl]+[Shift]+[P]キー」でコマンドパレットを表示して「shell」と入力します。
「ターミナル:ワークスペースでシェルを構成することを許可する」を選択します。
「表示(V)-統合ターミナル(I)」または、[Ctrl]+[@]を入力します。
画面下にbashターミナルが開きます。
C++言語のサンプルコード
「WSL(Ubuntu)のC++開発環境を Visual Studio Codeで構築」と同じサンプルコードを使用します。
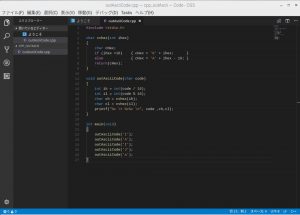
/home/pi/myHomeに cpp_outAscii ディレクトリーを作成して、ソースコード outAsciiCode.cpp を作成します。
「[ファイル(F)]-[フォルダを開く]」で、/home/pi/myHome/cpp_outAscii を指定します。
次に「[ファイル(F)]-[新規ファイル(N)]」で、outAsciiCode.cppを指定します。
#include <stdio.h>

char cvhex(int ihex)
{
    char cHex;
    if (ihex <10)    { cHex = '0' + ihex;      }
    else             { cHex = 'A' + ihex - 10; }
    return(cHex);
}

void outAsciiCode(char code)
{
    int ih = int(code / 16);
    int il = int(code % 16);
    char ch = cvhex(ih);
    char cl = cvhex(il);
    printf("%c \t %c%c \n", code ,ch,cl);
}

int main(void)
{
    outAsciiCode('1');
    outAsciiCode('A');
    outAsciiCode('I');
    outAsciiCode('J');
    outAsciiCode('a');
}
Rasbian環境でのビルドと実行
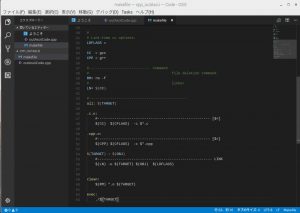
次に makefile を作成します。
# Makefile
#
#     make clean
#     make
#     make exec
#
#-----------------------------------------

#####
TARGET = outAscii

OBJ     =
OBJ    += outAsciiCode.o


# Optimaze Option
#
CFLAGOPT  =
CFLAGOPT += -O0

#
#
# cc options:
CFLAGS =
CFLAGS += -Wall
CFLAGS += -g
CFLAGS += $(CFLAGOPT)


#
# Link-time cc options:
LDFLAGS =

CC  = gcc
CPP = g++

#----------------------------- Command
#                                       file deletion command
RM= rm -f
#                                       linker
LN= $(CC)

#----------------------------------------------
all: $(TARGET)

.c.o:
	#----------------------------------------------------- [$<]
	$(CC)  $(CFLAGS)  -c $*.c

.cpp.o:
	#----------------------------------------------------- [$<]
	$(CPP) $(CFLAGS)  -c $*.cpp

$(TARGET) : $(OBJ)
	#------------------------------------------------------ LINK
	$(LN) -o $(TARGET) $(OBJ)  $(LDFLAGS)


clean:
	$(RM) *.o $(TARGET)

exec:
	./$(TARGET)
gdbでデバッグしますので、次のオプションを付けます。
- -g : コンパイル,リンク時にDEBUG情報を付加する
- -O0 : 最適化をしません
「表示(V)-統合ターミナル(I)」 で、ターミナルを開きます。makeコマンドでビルドします。
$make
#----------------------------------------------------- [outAsciiCode.cpp]
g++  -Wall  -g   -O0  -c outAsciiCode.cpp
#------------------------------------------------------ LINK
gcc -o outAscii   outAsciiCode.o
outAscii を実行して、結果を確認します。
$ ./outAscii
1        31
A        41
I        49
J        4A
a        61
makefileに実行用のオプションを入れましたので、makeコマンドからでも実行できます。
$ make exec
./outAscii
1        31
A        41
I        49
J        4A
a        61
Visual Studio Codeからビルド
Visual Studio Code から、プログラムのビルドをできるようにします。
「Tasks-Build Task」または、[Ctrl]+[Shift]+[B]と入力します。
「ビルドタスクを構成します」をクリックします。
「Others 任意の外部コマンドを実行する例」を選択します。
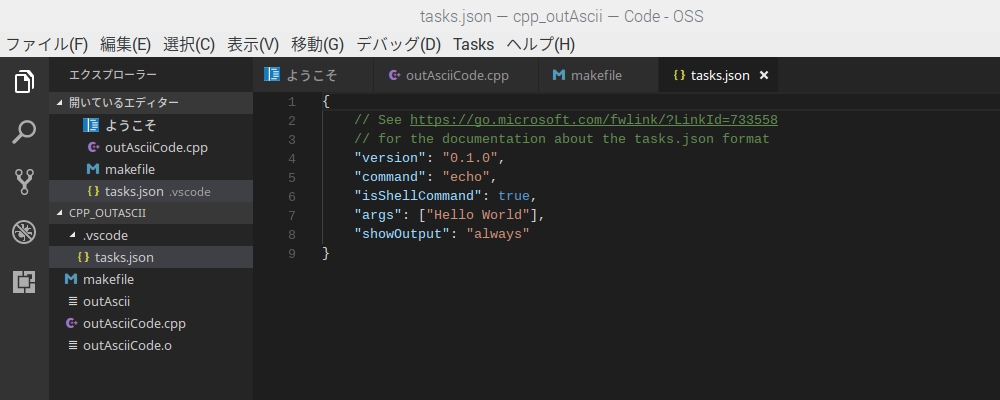
task.json のひな形が表示されます。
{
    // See https://go.microsoft.com/fwlink/?LinkId=733558
    // for the documentation about the tasks.json format
    "version": "0.1.0",
    "command": "echo",
    "isShellCommand": true,
    "args": ["Hello World"],
    "showOutput": "always"
}
Windows10版のVS Code (Version 1.21.1)のtask.jsonとは記述方法が異なるようです。バージョンが異なります。
| プラットフォーム | VS Code Ver. | task.json Ver. |
|---|---|---|
| Windows10 | Ver 1.21.1 | 2.0.0 |
| Rasbian | Ver 1.14.0 | 0.1.0 |
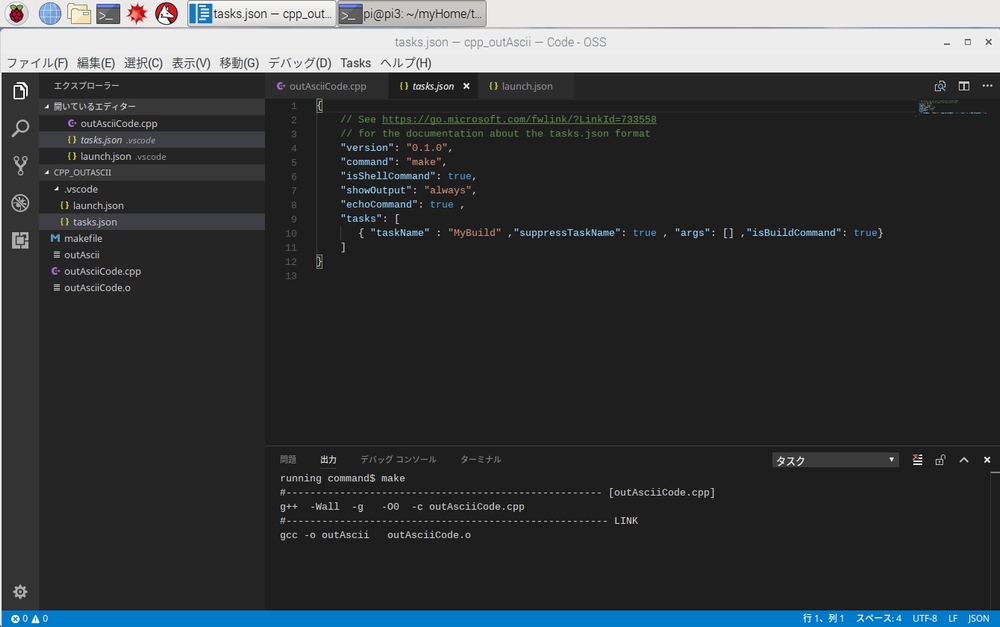
task.json を下記のように修正して、makeコマンドを実行するようにします。
{
    // See https://go.microsoft.com/fwlink/?LinkId=733558
    // for the documentation about the tasks.json format
    "version": "0.1.0",
    "command": "make",
    "isShellCommand": true,
    "showOutput": "always",
    "echoCommand": true ,
    "tasks": [
       { "taskName" : "MyBuild" ,"suppressTaskName": true , "args": [] ,"isBuildCommand": true}
    ]
}
「タスク(T)-ビルドタスクの実行(B)」 または、[Ctrl]+[Shift]+[B]キーで、makeコマンドを実行してビルドします。
Visual Studio Codeからプログラムの実行
Visual Studio Code から、プログラムの実行ができるようにします。
「Tasks-Test Task」と入力します。
「タスクランナーの構成」をクリックします。
{
    // See https://go.microsoft.com/fwlink/?LinkId=733558
    // for the documentation about the tasks.json format
    "version": "0.1.0",
    "command": "make",
    "isShellCommand": true,
    "showOutput": "always",
    "echoCommand": true ,
    "tasks": [
       { "taskName" : "MyBuild" ,"suppressTaskName": true , "args": [] ,"isBuildCommand": true}
    ]
}
task.json が表示されますので、下記のように修正します。
{
    // See https://go.microsoft.com/fwlink/?LinkId=733558
    // for the documentation about the tasks.json format
    "version": "0.1.0",
    "command": "make",
    "isShellCommand": true,
    "showOutput": "always",
    "echoCommand": true ,
    "tasks": [
       { "taskName" : "MyBuild" ,"suppressTaskName": true , "args": [] ,"isBuildCommand": true},
       { "taskName" : "MyTest"  ,"suppressTaskName": true , "args": ["exec"] ,"isTestCommand": true}
    ]
}
「Tasks-Test Task」と入力すると、実行することができました。
「Tasks-Run Task…」と入力します。
[MyTest]と[MyBuild]のタスクの選択となります。
- [MyTest]を選択すると、プログラム実行
- [MyBuild]を選択すると、プログラムのビルド
Visual Studio Code C++拡張機能インストール
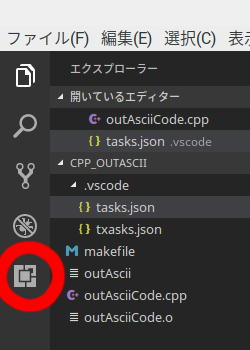
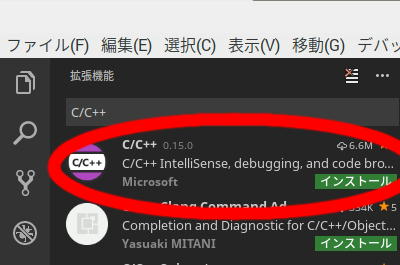
左の拡張機能をクリックして、検索窓に「C/C++」と入力します。
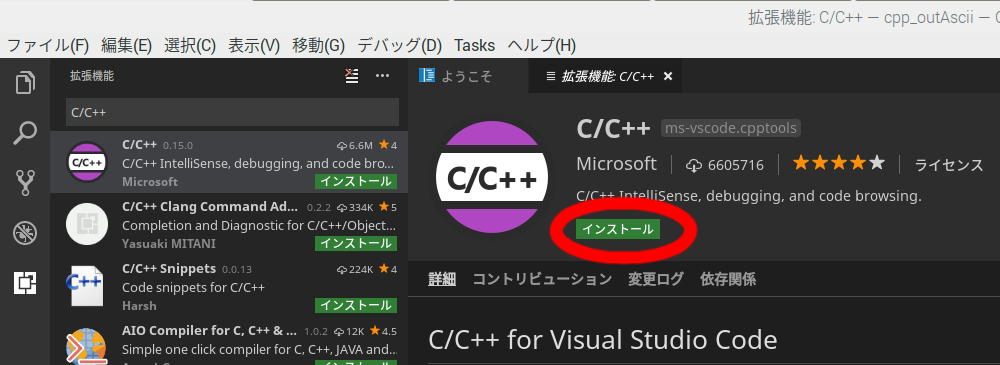
C/C++を選択してインストールします。
[インストール]をクリックします。
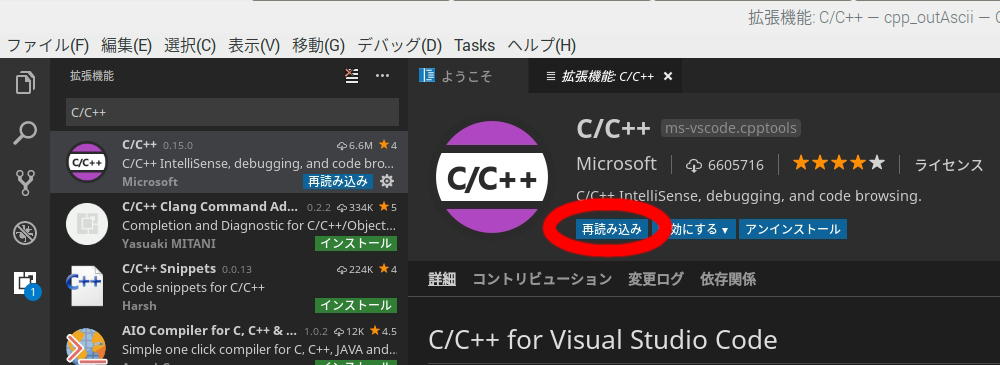
[再読み込み]をクリックします。
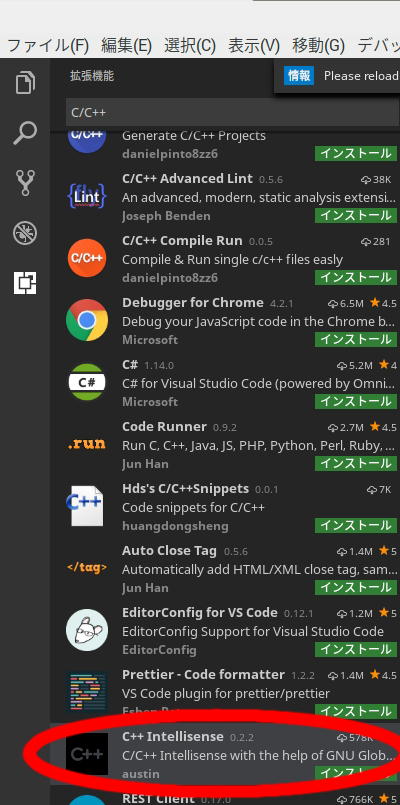
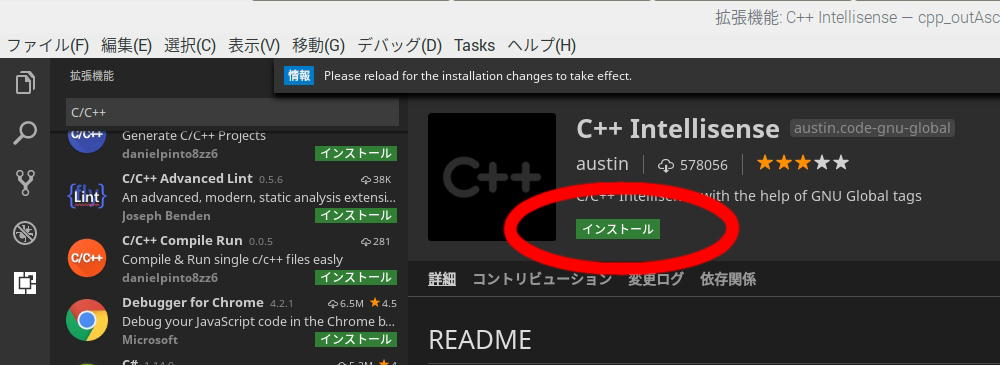
C/C++ InteliSense を選択してインストールします。
[インストール]をクリックします。
[再読み込み]をクリックします。
インストール済みの拡張機能を確認します。
Visual Studio Codeからデバッグの設定
Visual Studio Codeからブレークポイントを設定してデバッグできるようにします。
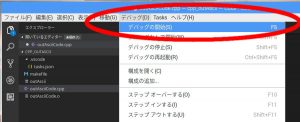
「デバッグ(D)-デバッグの開始(S)」または、[F5]と入力します。
環境の選択で [C++(GDB/LLDB)]を選択します。
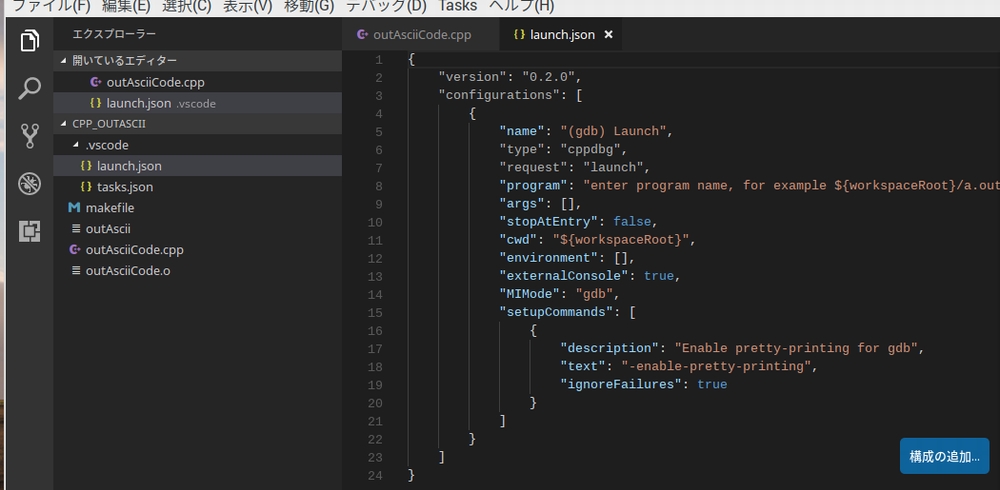
launch.json のひな形が表示されます。
{
    "version": "0.2.0",
    "configurations": [
        {
            "name": "(gdb) Launch",
            "type": "cppdbg",
            "request": "launch",
            "program": "enter program name, for example ${workspaceRoot}/a.out",
            "args": [],
            "stopAtEntry": false,
            "cwd": "${workspaceRoot}",
            "environment": [],
            "externalConsole": true,
            "MIMode": "gdb",
            "setupCommands": [
                {
                    "description": "Enable pretty-printing for gdb",
                    "text": "-enable-pretty-printing",
                    "ignoreFailures": true
                }
            ]
        }
    ]
}
launch.json を自分の環境に合わせて修正します。
program を修正します。
“program”: “enter program name, for example ${workspaceRoot}/a.out”,
↓
“program”: “${workspaceRoot}/outAscii”,
{
    "version": "0.2.0",
    "configurations": [
        {
            "name": "(gdb) Launch",
            "type": "cppdbg",
            "request": "launch",
            "program": "${workspaceRoot}/outAscii",
            "args": [],
            "stopAtEntry": false,
            "cwd": "${workspaceRoot}",
            "environment": [],
            "externalConsole": true,
            "MIMode": "gdb",
            "setupCommands": [
                {
                    "description": "Enable pretty-printing for gdb",
                    "text": "-enable-pretty-printing",
                    "ignoreFailures": true
                }
            ]
        }
    ]
}
Visual Studio Codeからデバッグの実行
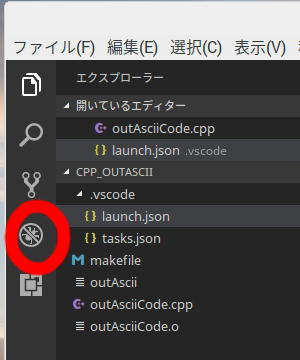
左のデバッグボタンを押します。
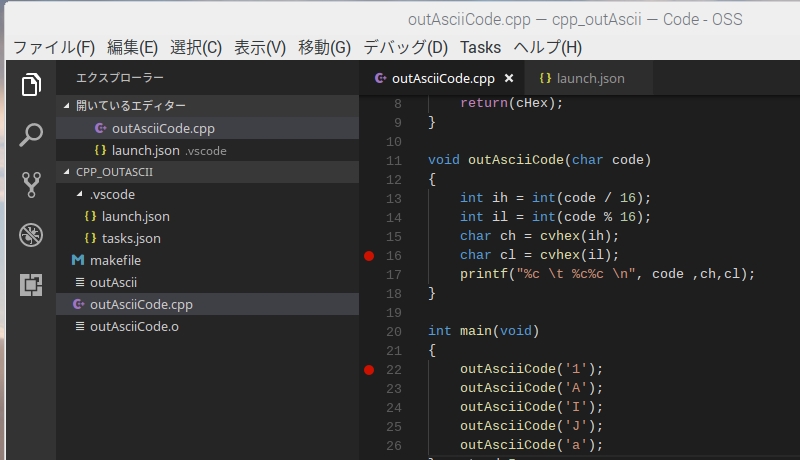
ソースコードの行番号の左をクリックしてブレークポイントを設定します。
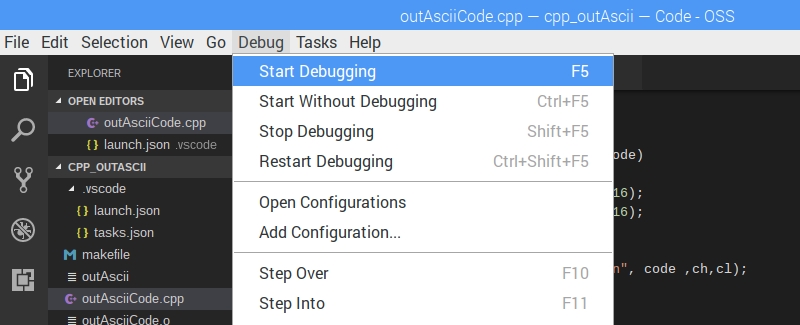
「デバッグ(D)-デバッグの開始(S)」をクリックします。
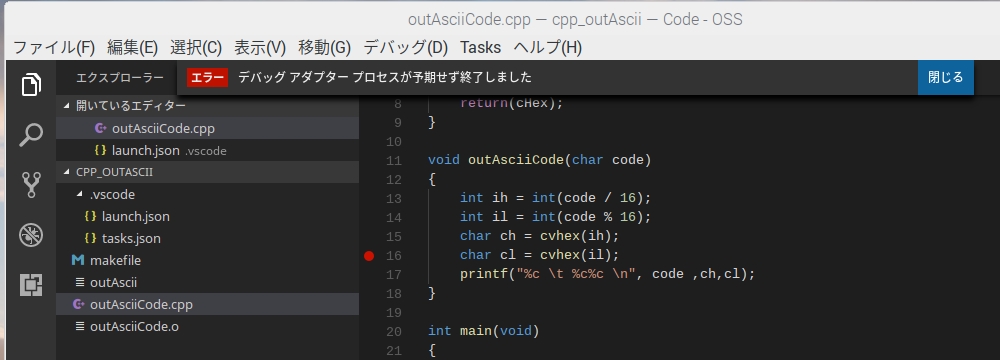
「デバッグアダプタープロセスが予期せずに終了しました」とエラーが発生して実行できませんでした。
デバッグ実行のエラー原因?
launch.json の記述内容にミスがあるかと考えて、いろいろ試行錯誤しましたが解決しません。
ネットで「Visual Studio Code デバッグアダプタープロセスが予期せずに終了しました」を検索キーとしていろいろ調べましたが、解決策らしい情報をみつけることができませんでした。「デバッグアダプタープロセスが予期せずに終了しました」という日本語のエラーメッセージに関する情報が少ないみたいです。
ロケールをEnglishにしたら、英語のメッセージが表示されるのではと考えました。
「Raspberry Pi Configuration」で Locale を ja(Japanese) → en(English) に変更してリブートします。
そして、Visual Studio Code を実行したら、メニューが英語表記になりました。
[F5]で実行します。
英語のエラーメッセージがわかりました。「Debug adapter process has terminated unexpectedly」というエラーです。
ネットで「Visual Studio Code Debug adapter process has terminated unexpectedly」を検索キーとして、いろいろ調べました。Debug adapter processの停止問題が多いようで、たくさんの情報がヒットしました。
どうも、C/C++拡張機能が ARMアーキテクチャーに正式に対応していないようです。
半分諦めかけていたときに、有益な情報をみつけることができました。
Debug adapter process has terminated unexpectedly on Raspberry pi #164にヒントがありました。
The C/C++ for Visual Studio Code extension has no official support for running on ARM platforms like the Raspberry Pi. However, it may work if you manually install Mono on your Pi by following the instructions here: http://www.mono-project.com/docs/getting-started/install/linux/#debian-ubuntu-and-derivatives
You’ll need to “apt-get install mono-runtime” at least, other packages may be required as well.
Visual Studio Code用のC/C++拡張拡張は、Raspberry PiのARMプラットフォームでの公式なサポートは無いようです。
I have a workaround to get the debugger working for you. You will need to download the mono runtime located at:
http://download.mono-project.com/repo/debian/pool/main/m/mono/The file you are looking for is called:
mono-runtime-sgen_4.2.3.4-0xamarin1_armhf.debExtract the .deb file to some location and locate the mono-sgen executable.
mkdir ~/mono_temp
dpkg -x mono-runtime-sgen_4.2.3.4-0xamarin1_armhf.deb ~/mono_tempThe file should be under ~/mono_temp/usr/bin
Copy the file to your extension folder as follows. Notice that the file name is renamed to mono.linux:
cp ~/mono_temp/usr/bin/mono-sgen ~/.vscode-oss-dev/extensions/ms-vscode.cpptools-0.9.0/debugAdapters/mono.linuxYour debugging should now work.
monoランタイムが必要と書いてあります。「mono」とは、何でしょうか?
調べてみると、Monoは.NET Framework互換の環境を実現するためのオープンソースのソフトウェアらしいです。
monoランタイムの mono-sgenを /…/debugAdapters/mono.linux にコピーしなさいと書いてあります。これは何をしているのか、少し調べてみました。
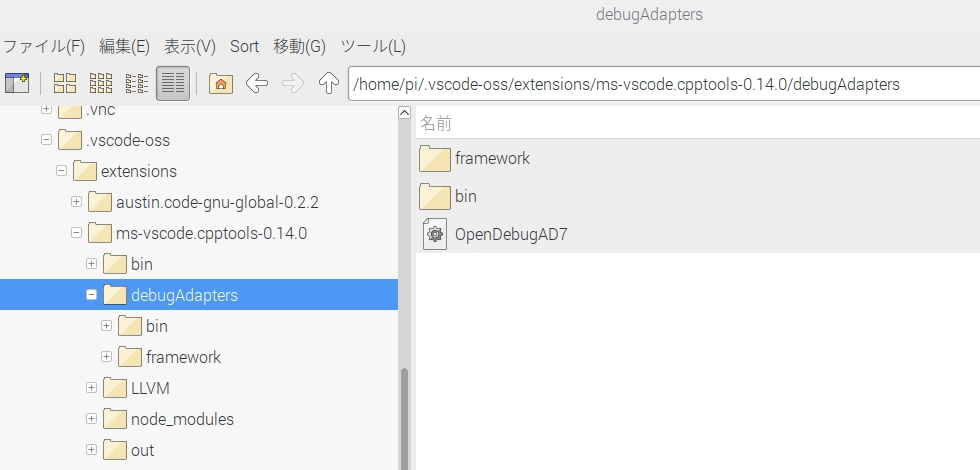
私の環境では、デバッグアダプターが「~/.vscode-oss/extensions/ms-vscode.cpptools-0.14.0/debugAdapters」にインストールされています。
OpenDebugAD7 の内容を見ました。
$ cat OpenDebugAD7
#!/usr/bin/env bash

BIN_DIR="$(cd "$(dirname "$0")" && pwd -P)"

PLATFORM_SUFFIX=""
ARCH_SUFFIX=""

case `uname` in
    "Darwin") PLATFORM_SUFFIX=".osx" ;;
    "Linux")
        PLATFORM_SUFFIX=".linux"
        case `uname -m` in
            "x86" | "i386" | "i686") ARCH_SUFFIX="-x86" ;;
            "x86_64") ARCH_SUFFIX="-x86_64" ;;
        esac
        ;;
esac

MONO_CMD=${BIN_DIR}/mono${PLATFORM_SUFFIX}${ARCH_SUFFIX}

# If we don't have a mono binary from the platform, try a globally-installed one
if [ ! -e "${MONO_CMD}" ] ; then
    MONO_CMD="mono"
fi

export MONO_PATH=${BIN_DIR}/framework
MONO_CMD="${MONO_CMD} --config ${BIN_DIR}/framework/config${PLATFORM_SUFFIX}"

# Uncomment to remote debug MIEngine
#MONO_CMD="${MONO_CMD} --debug --debugger-agent=transport=dt_socket,address=0.0.0.0:1234,server=y"

${MONO_CMD} ${BIN_DIR}/bin/OpenDebugAD7.exe $*
MONO_CMD は、「~/.vscode-oss/extensions/ms-vscode.cpptools-0.14.0/debugAdapters/mono.linux」となります。
実際に mono.linuxが無いので、mono を起動して実行エラーになっていると考えました。
Mono is a Cross platform, open source .NET frameworkを参照すると各種バージョンがそろっています。
この情報に基づいて、monoランタイムをインストールします。
$ mkdir mono_temp
$ wget http://download.mono-project.com/repo/debian/pool/main/m/mono/mono-runtime-sgen_4.2.3.4-0xamarin1_armhf.deb
 ・・・
`mono-runtime-sgen_4.2.3.4-0xamarin1_armhf.deb' に保存中
mono-runtime-sgen_4 100%[===================>]   1.16M  --.-KB/s    in 0.1s
`mono-runtime-sgen_4.2.3.4-0xamarin1_armhf.deb' へ保存完了 [1219066/1219066]

$ dpkg -x mono-runtime-sgen_4.2.3.4-0xamarin1_armhf.deb .

$ ls usr/bin
mono-sgen

$ cp usr/bin/mono-sgen /home/pi/.vscode-oss/extensions/ms-vscode.cpptools-0.14.0/debugAdapters/mono.linux
デバッグアダプターに mono.linux をコピーしたことを確認します。
デバッグ実行のエラー原因…解決したか?
mono.linux をインストールしたので、[F5]で再度実行してみます。
またもや、エラーが発生しました。
「Unable to start debugging. No terminal is available to launch the debugger. Please install Gnome Terminal or XTerm」
デバッガを起動するための端末が無いので、Gnome TerminalまたはXTermのインストールが必要なようです。
Gnome Terminalをインストールします。
$ sudo apt-get install gnome-terminal
今度はどうでしょうか? [F5]で実行してみます。
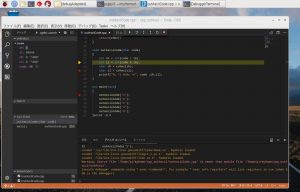
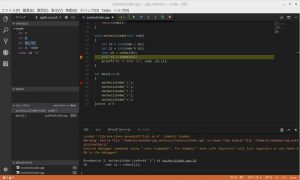
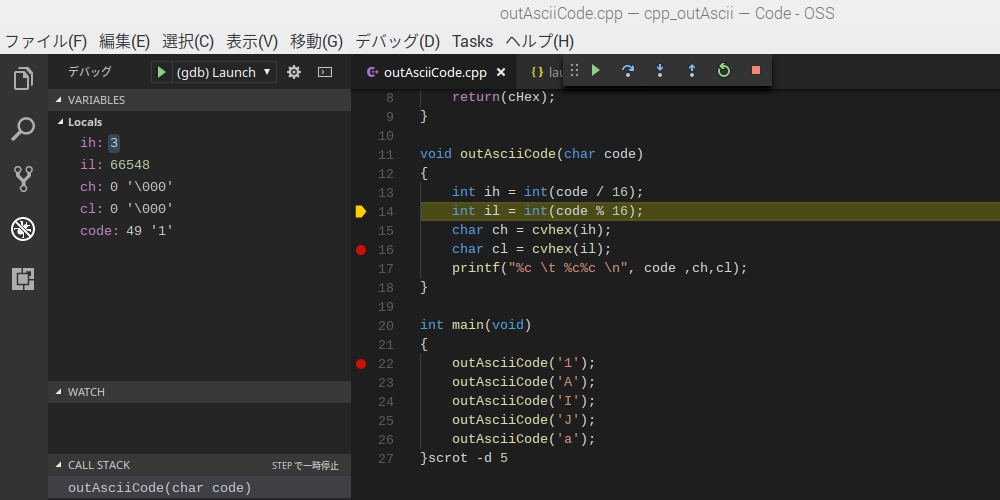
デバッグ実行が正常起動して、ブレークポイントで停止しました。これで、問題解決しました。
[F11]でシングルステップも正常に動作しています。
まとめ
Raspberry Pi3のC++開発環境をVisual Studio Codeで構築することができました。
C/C++拡張機能がARMアーキテクチャーに正式対応していませんでしたがネット情報を根気よく探した結果、手作業で動作するように対応できました。
このブログも同じ悩みをもつユーザーの役に立てば幸いです。
Raspberry Pi3のRasbian OSでVisual Studio Codeが使えるようになったのでC++の開発環境が快適になりました。
