
WSL UbuntuにRe:VIEWをインストール
WSL Ubuntu18.04にRe:VIEWをインストール
2019年1月、WSL Ubuntu18.04にRe:VIEWをインストールしました。使用したWindows10は、Windows 10 Home バージョン1803です。Ubuntuは、18.04.1です。
$ uname -a
Linux RZ82 4.4.0-17134-Microsoft #471-Microsoft Fri Dec 07 20:04:00 PST 2018 x86_64 x86_64 x86_64 GNU/Linux
$ lsb_release -a
No LSB modules are available.
Distributor ID: Ubuntu
Description:    Ubuntu 18.04.1 LTS
Release:        18.04
Codename:       bionic
Windows10にWSL(Windows Subsystem for Linux) Ubuntu18.04環境をインストールして使用しています。
Re:VIEW 執筆支援システムとは
Re:VIEWは、電子書籍向けの簡易なマークアップ言語で記述したテキストファイルをEPUBやPDFなどの形式に変換するツールセットです。
これまで、Windows10にRe:VIEW 2.5.0をインストールして2冊の電子書籍を書いてきました。

新しいRe:VIEW3.0.0のリリース
2018年11月30日に新しいバージョンのRe:VIEW 3.0.0がリリースになりました。TeX関係など大きく変更になったらしいです。
Re:VIEW 2.5.0は使用中なので環境を残しながらRe:VIEW 3.0.0をインストールしたいと考えています。私は、Linux派ではなくどちらかというとWindowsを主に使用します。そこで、執筆作業はWindowsを中心とした環境にしたいと考えています。
異なるバージョンのRe:VIEWをWindows10に同居可能とする方法が不明です。そこで、Windows10にはRe:VIEW 2.5.0の環境を残して、WSL UbuntuにRe:VIEW 3.0.0をインストールすることにしました。動いているOSが異なるので、2つの環境を1台のPCに共存することができます。さらに、WSL UbuntuはWindowsのドライブをマウントできるので、原稿の執筆はWindowsで行ってEPUBのビルドをWSL Ubuntuで行えます。
Rubyのインストール
Re:VIEWをインストールするには、最初にRubyが必要です。まず、Rubyをインストールします。
$ sudo apt install ruby
Rubyのバージョンは、2.5.1でした。
$ ruby --version
ruby 2.5.1p57 (2018-03-29 revision 63029) [x86_64-linux-gnu]
TeXのインストール
PDF出力する場合は、TeXによりPDF変換するのでTeXが必要です。すでに、TeXLive2018をインストール済みなので、ここでは説明を割愛します。
Re:VIEWのインストール
「gem install review」 コマンドで Re:VIEWをインストールします。
$ sudo gem install review
Fetching: image_size-2.0.0.gem (100%)
Successfully installed image_size-2.0.0
Fetching: rouge-3.3.0.gem (100%)
Successfully installed rouge-3.3.0
Fetching: rubyzip-1.2.2.gem (100%)
Successfully installed rubyzip-1.2.2
Fetching: review-3.0.0.gem (100%)
Successfully installed review-3.0.0
Parsing documentation for image_size-2.0.0
Installing ri documentation for image_size-2.0.0
Parsing documentation for rouge-3.3.0
Installing ri documentation for rouge-3.3.0
Parsing documentation for rubyzip-1.2.2
Installing ri documentation for rubyzip-1.2.2
Parsing documentation for review-3.0.0
Installing ri documentation for review-3.0.0
Done installing documentation for image_size, rouge, rubyzip, review after 42 seconds
4 gems installed
Re:VIEW 3.0.0のインストールが完了しました。
$ review
usage: review <command> [<args>]
Re:VIEW commands are:
  init      : generate Re:VIEW project directory.
  update    : update Re:VIEW project to newest environment.
  preproc   : preprocess Re:VIEW document file.
  compile   : convert Re:VIEW document file.
  epubmaker : build EPUB.
  webmaker  : build web pages.
  epub2html : convert EPUB to single HTML.
  pdfmaker  : build PDF with LaTeX.
  textmaker : build text files.
  vol       : show volume of Re:VIEW document.
  check     : check there are no REJECT words in the document.
  index     : show heading list.
  validate  : validate Re:VIEW document files.
  version   : show Re:VIEW version.
  --help    : show this message.
Re:VIEWのバージョンを確認します。
pi@RZ82:~$ review version
3.0.0
バージョンのまとめ
今回 Re:VIEWをインストールした環境のバージョンを示します。
| モジュール | バージョン |
|---|---|
| Linux | Ubuntu 18.04.1 LTS |
| Ruby | 2.5.1p57 |
| TeX | TeX 3.14159265 (TeX Live 2018) |
| Re:VIEW | 3.0.0 |
Re:VIEWを使う
作業のディレクトリーを MyHome(/mnt/c/Users/pi/MyHome/U18.04)に移動します。このディレクトリーは、Windowsのディレクトリーです。
原稿作成
Re:VIEWの原稿を作成するためにreview-initコマンドでひな型を取得します。
$ cd MyHome
$ review-init sample
treeコマンドで、sampleディレクトリーの内容を確認します。
$ cd sample
$ tree  --charset=C
.
|-- Gemfile
|-- Rakefile
|-- catalog.yml
|-- config.yml
|-- doc
|   |-- catalog.ja.md
|   |-- catalog.md
|   |-- customize_epub.ja.md
|   |-- customize_epub.md
|   |-- format.ja.md
|   |-- format.md
|   |-- format_idg.ja.md
|   |-- makeindex.ja.md
|   |-- makeindex.md
|   |-- pdfmaker.ja.md
|   |-- pdfmaker.md
|   |-- preproc.ja.md
|   |-- preproc.md
|   |-- quickstart.ja.md
|   |-- quickstart.md
|   |-- writing_vertical.ja.md
|   `-- writing_vertical.md
|-- images
|   |-- cover-a5.ai
|   `-- cover.jpg
|-- layouts
|-- lib
|   `-- tasks
|       `-- review.rake
|-- sample.re
|-- sty
|   |-- README.md
|   |-- gentombow.sty
|   |-- jsbook.cls
|   |-- jumoline.sty
|   |-- plistings.sty
|   |-- review-base.sty
|   |-- review-custom.sty
|   |-- review-jsbook.cls
|   |-- review-style.sty
|   `-- reviewmacro.sty
`-- style.css

6 directories, 36 files
原稿 sample.reは空(ファイルの内容は “= ” だけ)ですので、次のような原稿を書きます。原稿ファイルの文字コードは、UTF-8とします。
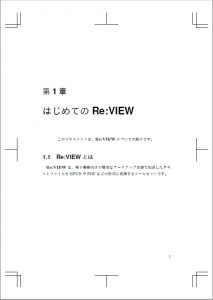
= はじめてのRe:VIEW

//lead{
このドキュメントは、@<b>{Re:VIEW}についての紹介です。
//}

== Re:VIEWとは

@<b>{Re:VIEW}は、電子書籍向けの簡易なマークアップ言語で
記述したテキストファイルをEPUBやPDFなどの形式に
変換するツールセットです。
EPUB生成
rake epubコマンドで、EPUB文書を生成します。
$ rake epub
review-epubmaker config.yml
/usr/lib/ruby/vendor_ruby/rake/file_utils.rb:54: warning: Insecure world writable dir /mnt/c in PATH, mode 040777
warningが出ましたが、book.epub というEPUBファイルを生成しましたので、Microsoft EdgeでEPUBを確認します。

PDF生成
rake pdfコマンドで、PDF文書を生成します。
$ rake pdf
review-pdfmaker config.yml
/usr/lib/ruby/vendor_ruby/rake/file_utils.rb:54: warning: Insecure world writable dir /mnt/c in PATH, mode 040777
INFO: compiling sample.tex
INFO: extractbb cover-a5.ai cover.jpg
/usr/lib/ruby/2.5.0/open3.rb:199: warning: Insecure world writable dir /mnt/c in PATH, mode 040777
INFO: uplatex -interaction=nonstopmode -file-line-error __REVIEW_BOOK__.tex
INFO: uplatex -interaction=nonstopmode -file-line-error __REVIEW_BOOK__.tex
INFO: uplatex -interaction=nonstopmode -file-line-error __REVIEW_BOOK__.tex
INFO: dvipdfmx -d 5 -z 9 __REVIEW_BOOK__.dvi
warningが出ましたが、book.pdf というEPUBファイルを生成しましたので、Adobe Acrobat Reader DC でPDF文書を確認します。
-

- PDFサンプル1
-
- PDFサンプル2

-
- PDFサンプル3
Re:VIEW2.5.0とは少しPDFの形式が変わりましたね。
ワーニングの調査
このワーニングは、Re:VIEW動作というよりRubyが出しています。
warning: Insecure world writable dir /mnt/c in PATH, mode 040777
WSLがPATHをアクセスするとき、Windowsドライブに対して権限過剰だと警告しているらしいです。
対処方法としては、下記の2つがあります。
- 環境変数PATHにWindowsのパスを含めない
- Rubyのオプションで警告を無視する
WSLは、Re:VIEWを使用するのが目的なので、WSLからWindowsコマンドを起動することは考えていません。そこで、前者の対策を行いました。
まず、現在のPATHを確認します。
$ echo $PATH
/usr/local/sbin:/usr/local/bin:/usr/sbin:/usr/bin:/sbin:/bin
:/usr/games:/usr/local/games
:/mnt/c/PROGRA~2/JUSTSY~1/JSLIB32
:/mnt/c/Program Files (x86)/Intel/iCLS Client
:/mnt/c/Program Files/Intel/iCLS Client
:/mnt/c/Windows/System32
:/mnt/c/Windows
:/mnt/c/Windows/System32/wbem
:/mnt/c/Windows/System32/WindowsPowerShell/v1.0
:/mnt/c/Program Files (x86)/Intel/Intel(R) Management Engine Components/DAL
:/mnt/c/Program Files/Intel/Intel(R) Management Engine Components/DAL
:/mnt/c/Program Files (x86)/Intel/Intel(R) Management Engine Components/IPT
:/mnt/c/Program Files/Intel/Intel(R) Management Engine Components/IPT
:/mnt/c/Program Files (x86)/JustSystems/JSLIB32
:/mnt/c/Program Files/dotnet
:/mnt/c/Program Files/Calibre2
:/mnt/c/Windows/System32/OpenSSH
:/mnt/c/Program Files/nodejs:/mnt/c/Program Files/Intel/WiFi/bin
:/mnt/c/Program Files/Common Files/Intel/WirelessCommon
:/mnt/c/Ruby25-x64/bin
:/mnt/c/Users/pi/AppData/Local/Microsoft/WindowsApps
:/mnt/c/Program Files/Microsoft VS Code/bin
:/mnt/c/texlive/2018/bin/win32
:/mnt/c/Users/pi/AppData/Roaming/npm
:/snap/bin
/mnt/c/がたくさんありますね。
PATHから、/mnt/○を削除します。
$ export PATH="$(echo "$PATH" | sed -r -e 's;:/mnt/[^:]+;;g')"
修正後のPATHを確認します。
$ echo $PATH
/usr/local/sbin:/usr/local/bin:/usr/sbin:/usr/bin:/sbin:/bin:/usr/games:/usr/local/games:/snap/bin
これでワーニングが発生しなくなったので、.bashrc に書いておきます。
まとめ
Windows10のWSL Ubuntu18.04環境にRe:VIEW 3.0.0をインストールしました。
Windowsに直接Re:VIEWをインストールするよりも、WSL Ubuntuにインストールした方が、windowsへの影響が最小限となり良いと思いました。
ボチボチとRe:VIEW 2.5.0の原稿を新しいRe:VIEW 3.0.0でビルドできるようにしてみたいと思います。